Setting up R
At the end of this lesson, you should:
- have established a dedicated directory for this workshop
- understand what a working directory is and how to set it
- turn off automatic saving of .Rdata files
Set up your directory
- Established a dedicated directory for this class somewhere on your computer.
- Create a subdirectory in that folder called “data”
- Download the workshop data (zipped file) After downloading all the workshop data, unzip the file and place all the individual files inside the “data” subdirectory

Set the R “working directory”
In order to import a file, we first need to set the “working directory”. This is the location on your computer where R will work for files and will also save files to that location. This is similar to a default directory that software look to, like how Microsoft office products often default to OneDrive for where to save or open a file.
Go to uppper toolbar, select Session –> Set Working Directory –> Choose Directory…
Navigate to where you set up a dedicated directory for the workshop and click “open”.
Set up RStudio
We need to make some changes to the default settings of RStudio to ensure that our work is reproducible and we do not have problems later on.
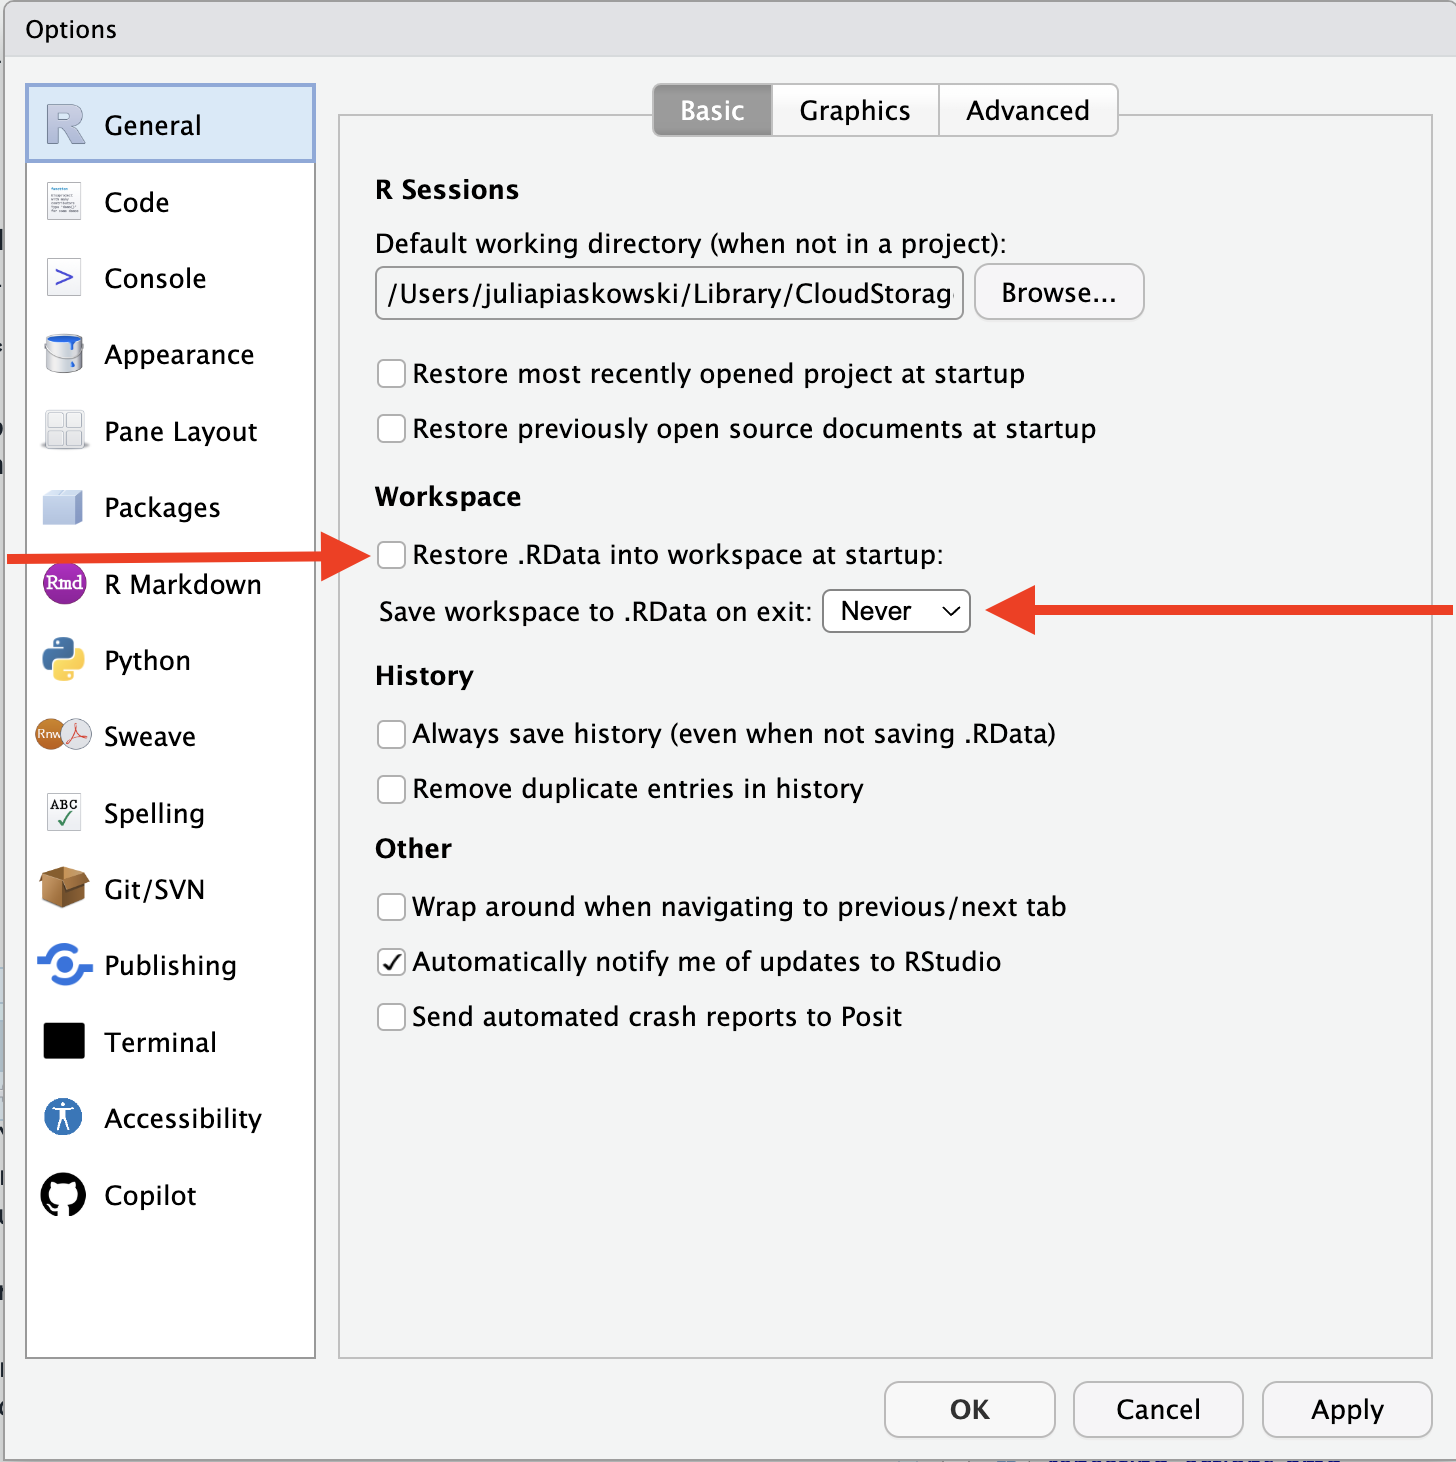
Go to uppper toolbar, select Tools –> Global Options –> General tab
- uncheck “Restore .RData into workspace at startup”
- change “Save workspace to .RData on exit” to never
- click “okay”

This ensure that every time we start R, we are starting with a blank state and no leftover information from a previous session. You only need to do this once and it will persist for all future R sessions.
For more information on the importance of setting blank slate, see this presentation, Basics of Best Practices
You are now ready to start learning how to program in R.
